Member Center
  • Features
  • Pricing
  • Learn
  • Sign Up
  • Log In
  • Features
  • Pricing
  • Learn
  • Sign Up
  • Log In

Webwho? Webhooks and when to use them

1/21/2024

 
​
​
What is a Webhook?, Why should I use a Webhook? Should I use Webhoooks?


We have to apologize now.. In this article we are going to geek out a bit and answer all of your webhook questions. We will also look at a specific example of how one of our customers is using webhooks to automate their form system with HubSpot.
Picture

​Webhooks typically are used to connect two different apps.

​Wait isn't that an API?
Not quite. Webhooks typically are used to connect two different applications. When an event is triggered in a application that supports Webhooks, the app will "serialize" data about that event and send it to Webhook URL. The application on the other end will usually upload or download data for a given event, but not necessarily both. Meanwhile, an API is designed specifically to manage communication and maintain state between applications. As a result, Webhooks can't handle complicated data streams or complex processes in the same way that APIs can. 

Sounds like webhooks are awful and I should use an API... RIGHT... 

Although we would usually recommend using API for something complex and custom, sometimes it's not an option, or an API is overkill. Webhooks really flow in one direction, and can simplify tasks that don't depend on complex responses. That makes Webhooks faster and more efficient in terms of communication and data efficiency. So it's great if you want to use the push model to immediately push updates or if you need an alternative to API.

Picture

an example: using webhooks with jotform and zapier to pass information to hubspot

One of our clients recently mentioned a problem they were having, that got us thinking.... this may be best solved by a Webhook.  
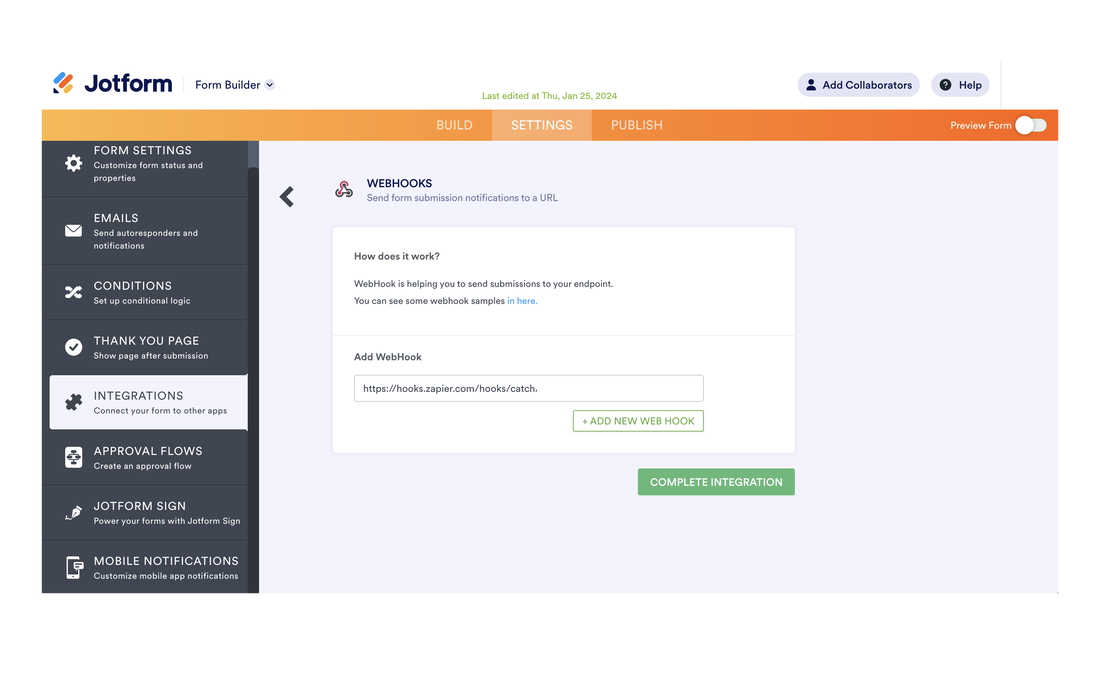
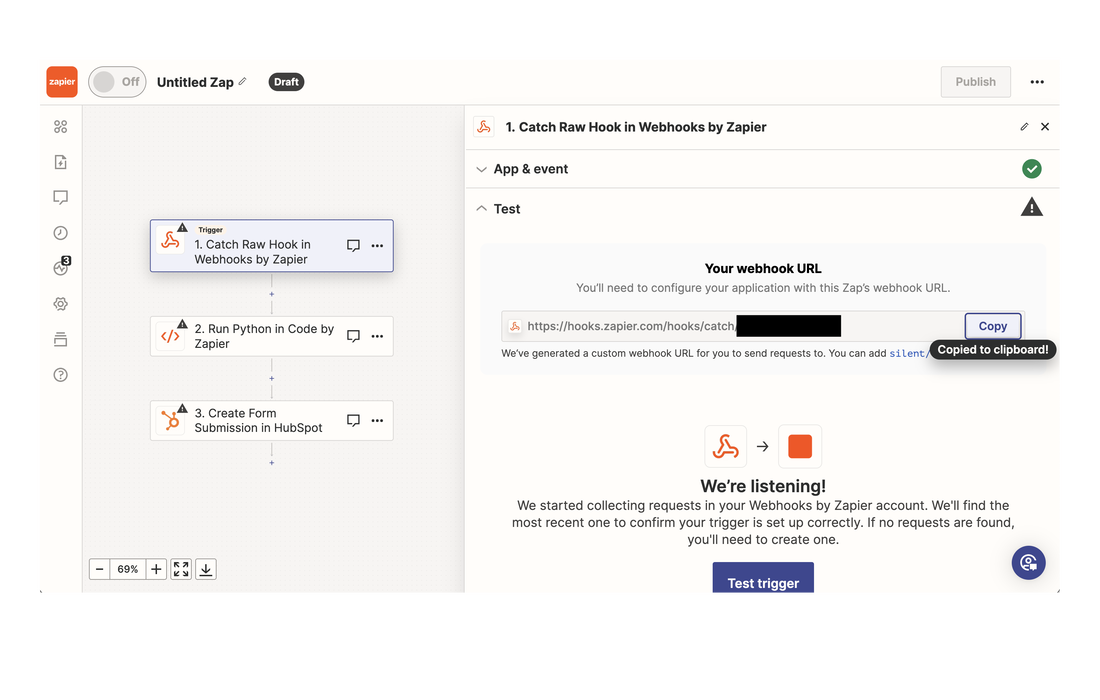
The problem: How do we link Jotform to HubSpot using Zapier?
Our client was using Jotform as a registration system and they wanted to keep their registrant information in their HubSpot customer relationship management software. There is a native integration in the HubSpot marketplace, but it was barely helpful. So we had an idea! We could make a hidden form in HubSpot and pass all of the Jotform information to the HubSpot form. Read more about that here. However, that meant we had to create a new Zap for each form - that was not effective of efficient - this is where the Webhook comes into play! You can make one link that shares all Jotform submissions through Zapier to HubSpot. Let's take a look how we made that happen! 

JotForm: The Big BANG

Picture
First off, thankfully Jotform lets us configure a Webhook (Read more here). Basically, anytime someone submits the a form, the Webhook fires off a copy of the form data! We are going to setup a Zap in Zapier to catch the Webhook. 

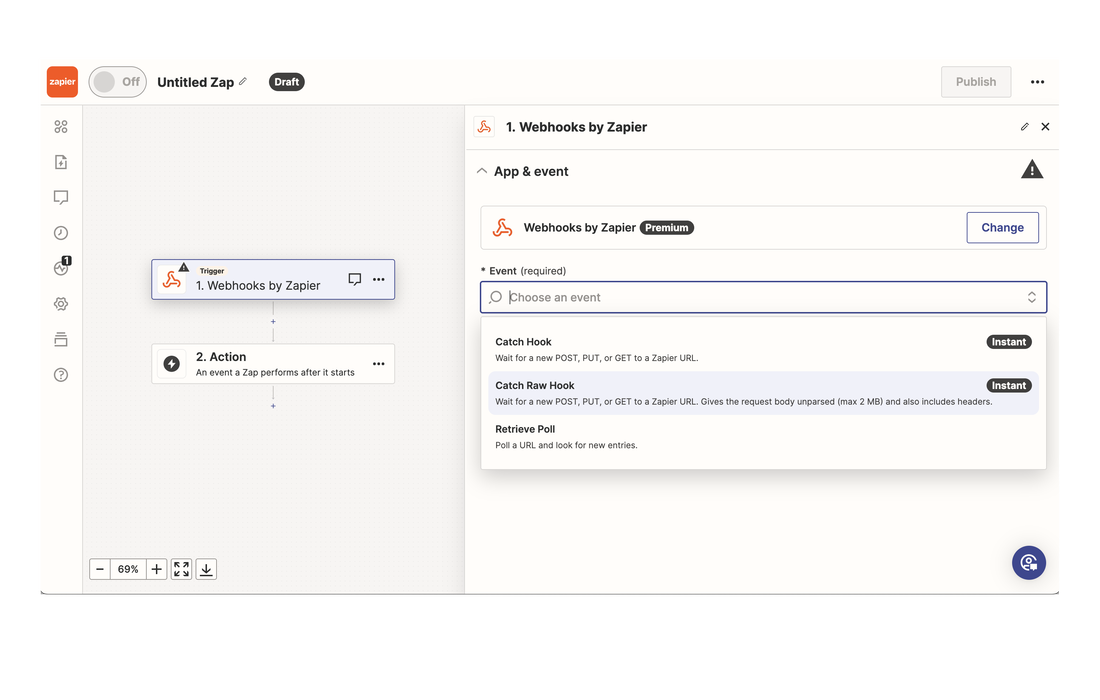
Zapier: Evolutionary Data

Now, we can go into Zapier and create a new Zap. Zapier has a ton of pre-made Zaps, but we are going roll up our sleeves and do some custom stuff! Look for "Webhooks by Zapier", then for the event, "Catch Raw Hook". Ok, so what the Space Balls is going on here? Well, when we publish this Zap, Zapier is going to give us a URL that this Zap is listening on. Then, when a Webhook request comes in (a Jotform submission), Zapier is going to accept the request and copy the RAW data from the request. ... hang in there, it will make sense soon!

​Next we are going to set an action, this time look for "Code by Zapier". For the event, select "Run Python". Why Python instead of Javascript? Please watch the Wisdom of James Mickens and all will be revealed. 

​Finally, add one last step, and select "HubSpot". For the event, use "Create Form Submission". You will need to link your HubSpot account with Zapier, which can be done here. Finally, you will need to go into HubSpot and create a form with the fields you want to collect from your Jotforms. 

This is the overall flow of the Zap, when a user submits a Jotform, the Webhook will send data to Zapier. Zapier will take the data, run it through some Python code, and then send it to HubSpot. Sounds pretty nifty huh?! Now, lets fill in the missing pieces! 
Picture
Picture
Picture

Coloring in the lines
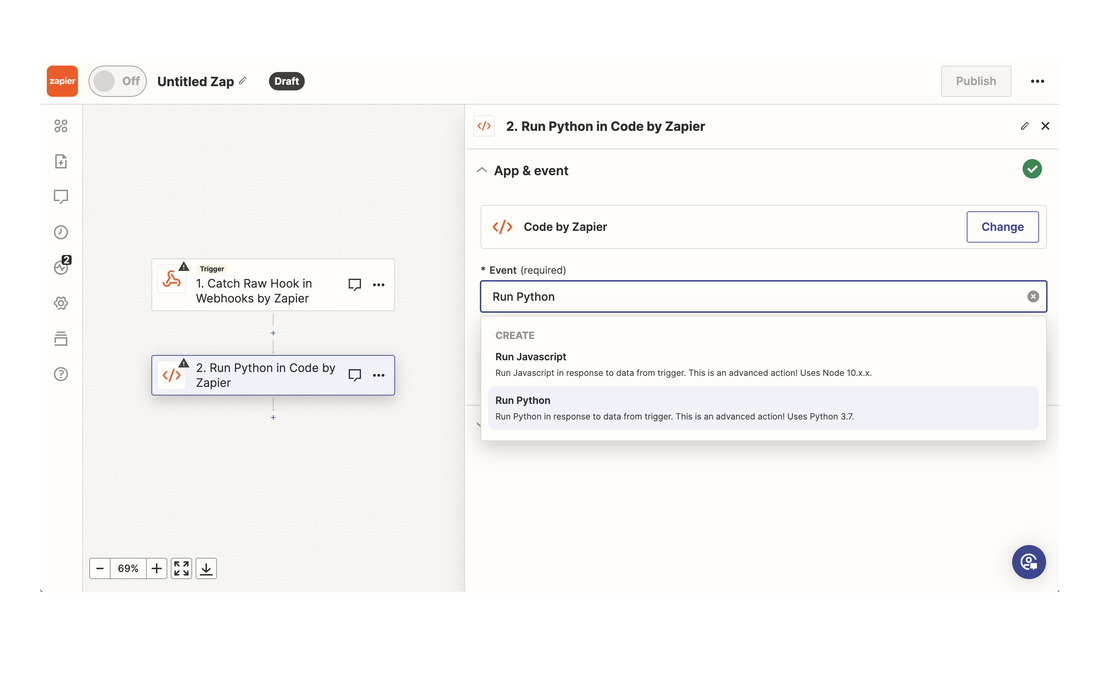
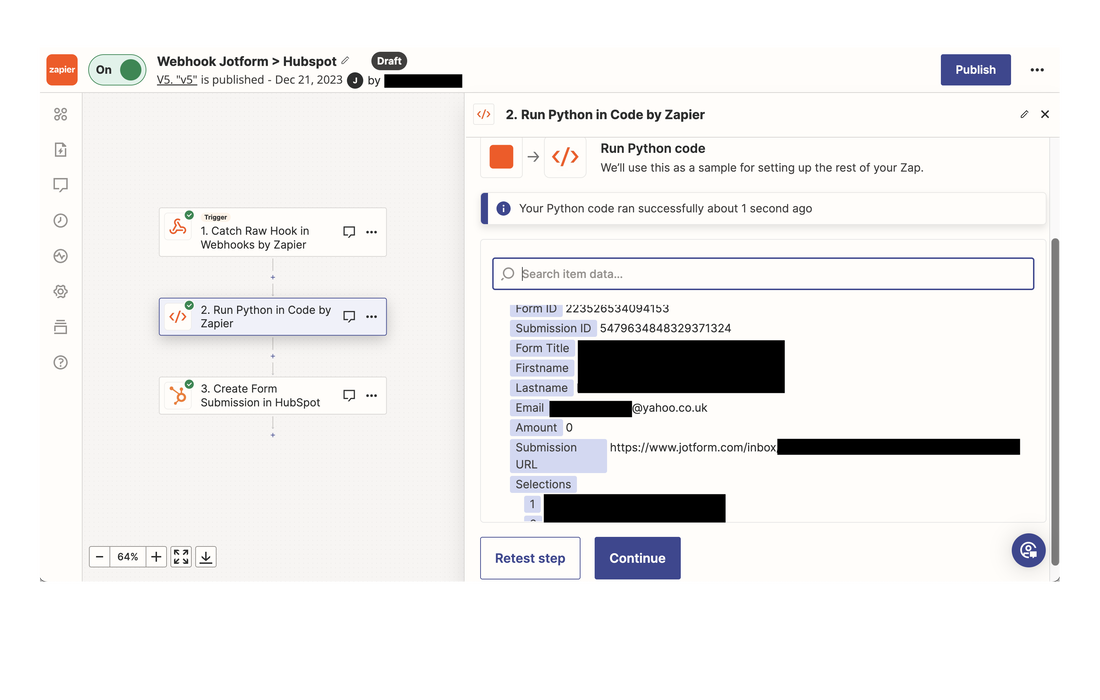
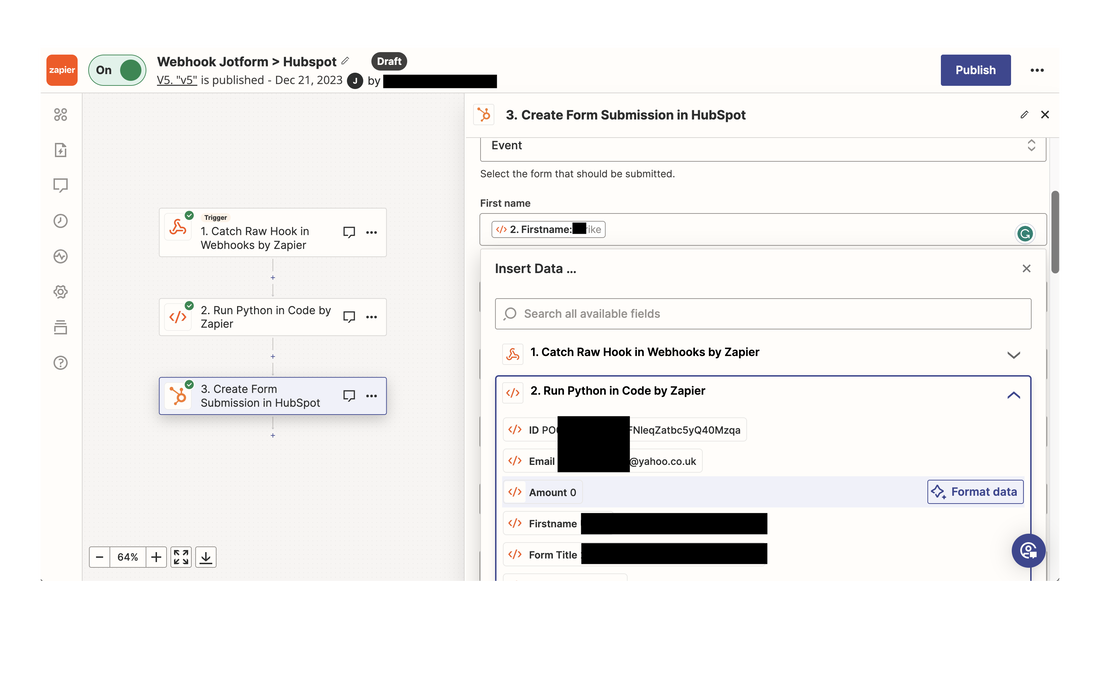
Picture
Click on the trigger in Zapier and expand the Test pane. It will give you your Webhook URL. Copy and paste this URL in Jotform Webhook Integration setting. This is where Jotform needs to send the form data to Zapier.

Next, click on Python code action. Expand the Action pane, and paste the following Python code in to the *Code textbox. 
Zapier Python Code

    
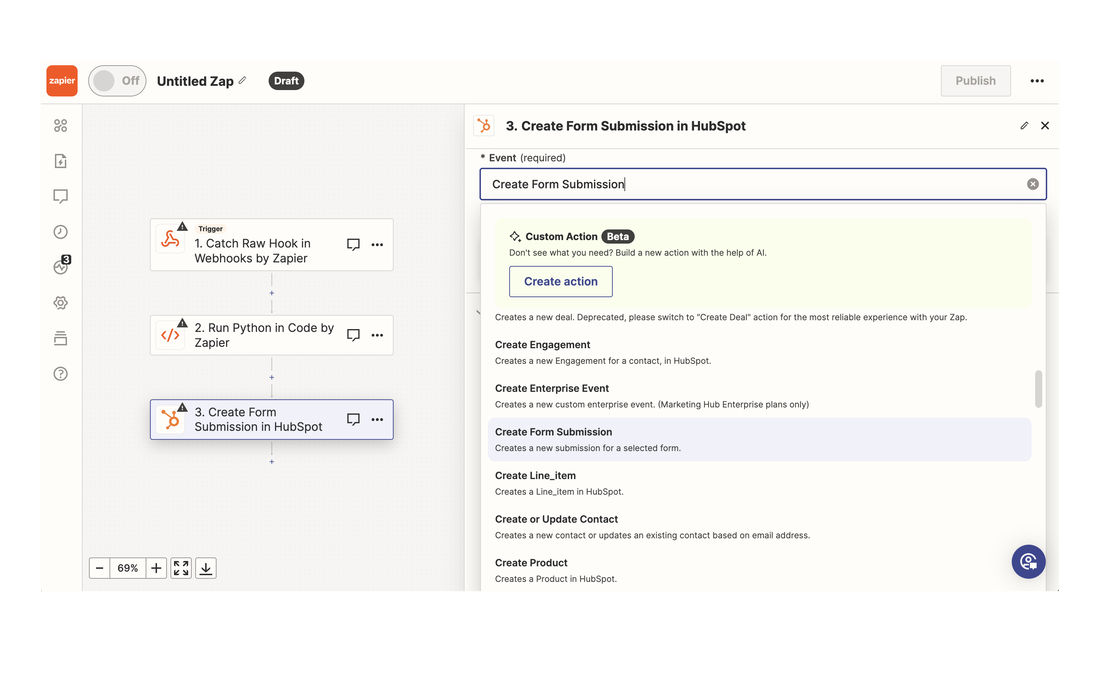
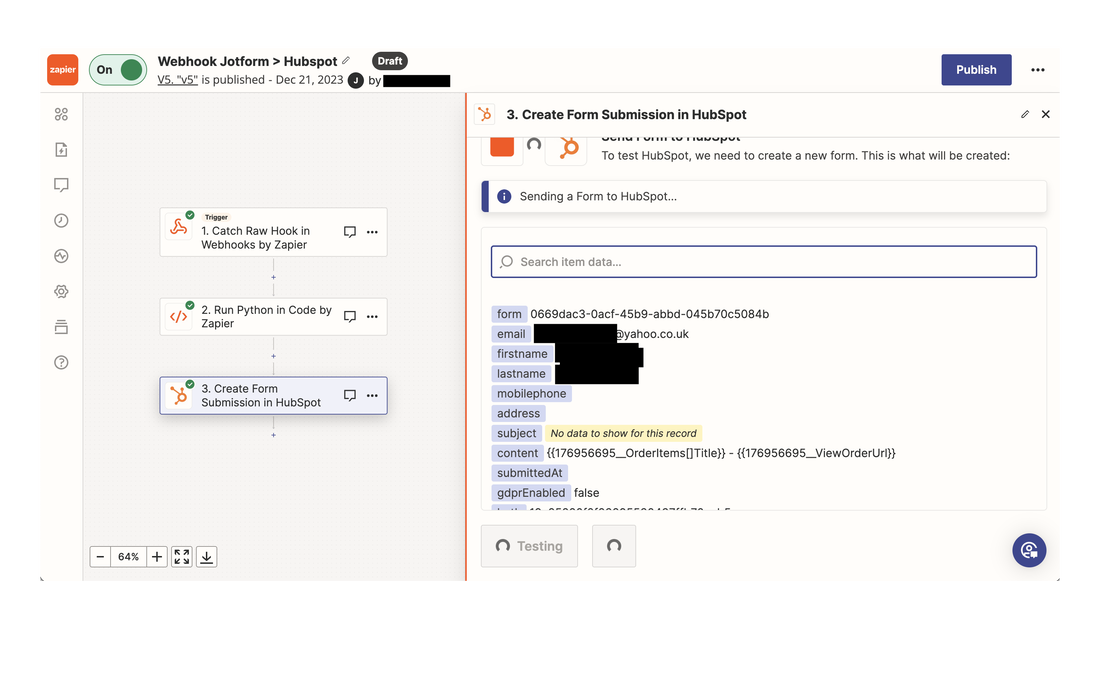
Then, in the HubSpot step, and after you have connected you HubSpot account, select the Action pane. Here, select the HubSpot form you want the data sent to.

Testing: Can you hear me now?

Now, we need to submit a Jotform, so the Webhook fires and sends data to Zapier. After you click submit on your Jotform, go over to Zapier, in the first step, click the Test pane. Click "Test Trigger". It should capture the request that Jotform sent!

Then click on the Python step and expand the Test pane. Here the Python code will run, and parse out the request from Jotform into fields that Zapier and HubSpot can make use of. 

Finally, if we click on the last step, HubSpot, and expand the Action pane. We can take the parsed fields from the Python code and map them to the HubSpot form fields we want to submit. If you click on Test, you should be able to test the submission to the HubSpot form! 

There are many ways to customize this, such as adding products, and calculating a total to pass on to HubSpot. Depending on how creative you need to be, you may need to crack open the Python code and break out separate dictionary key value pairs for your HubSpot form. Don't worry if that didn't make sense, if you need help, drop us a line with the Contact Us link below!
Picture
Picture
Picture
Picture

Comments are closed.
Join our Mailing List
Contact Us
Love our graphics? We do too! Check out @Storyset!